Making Trees
Crafting Your World series
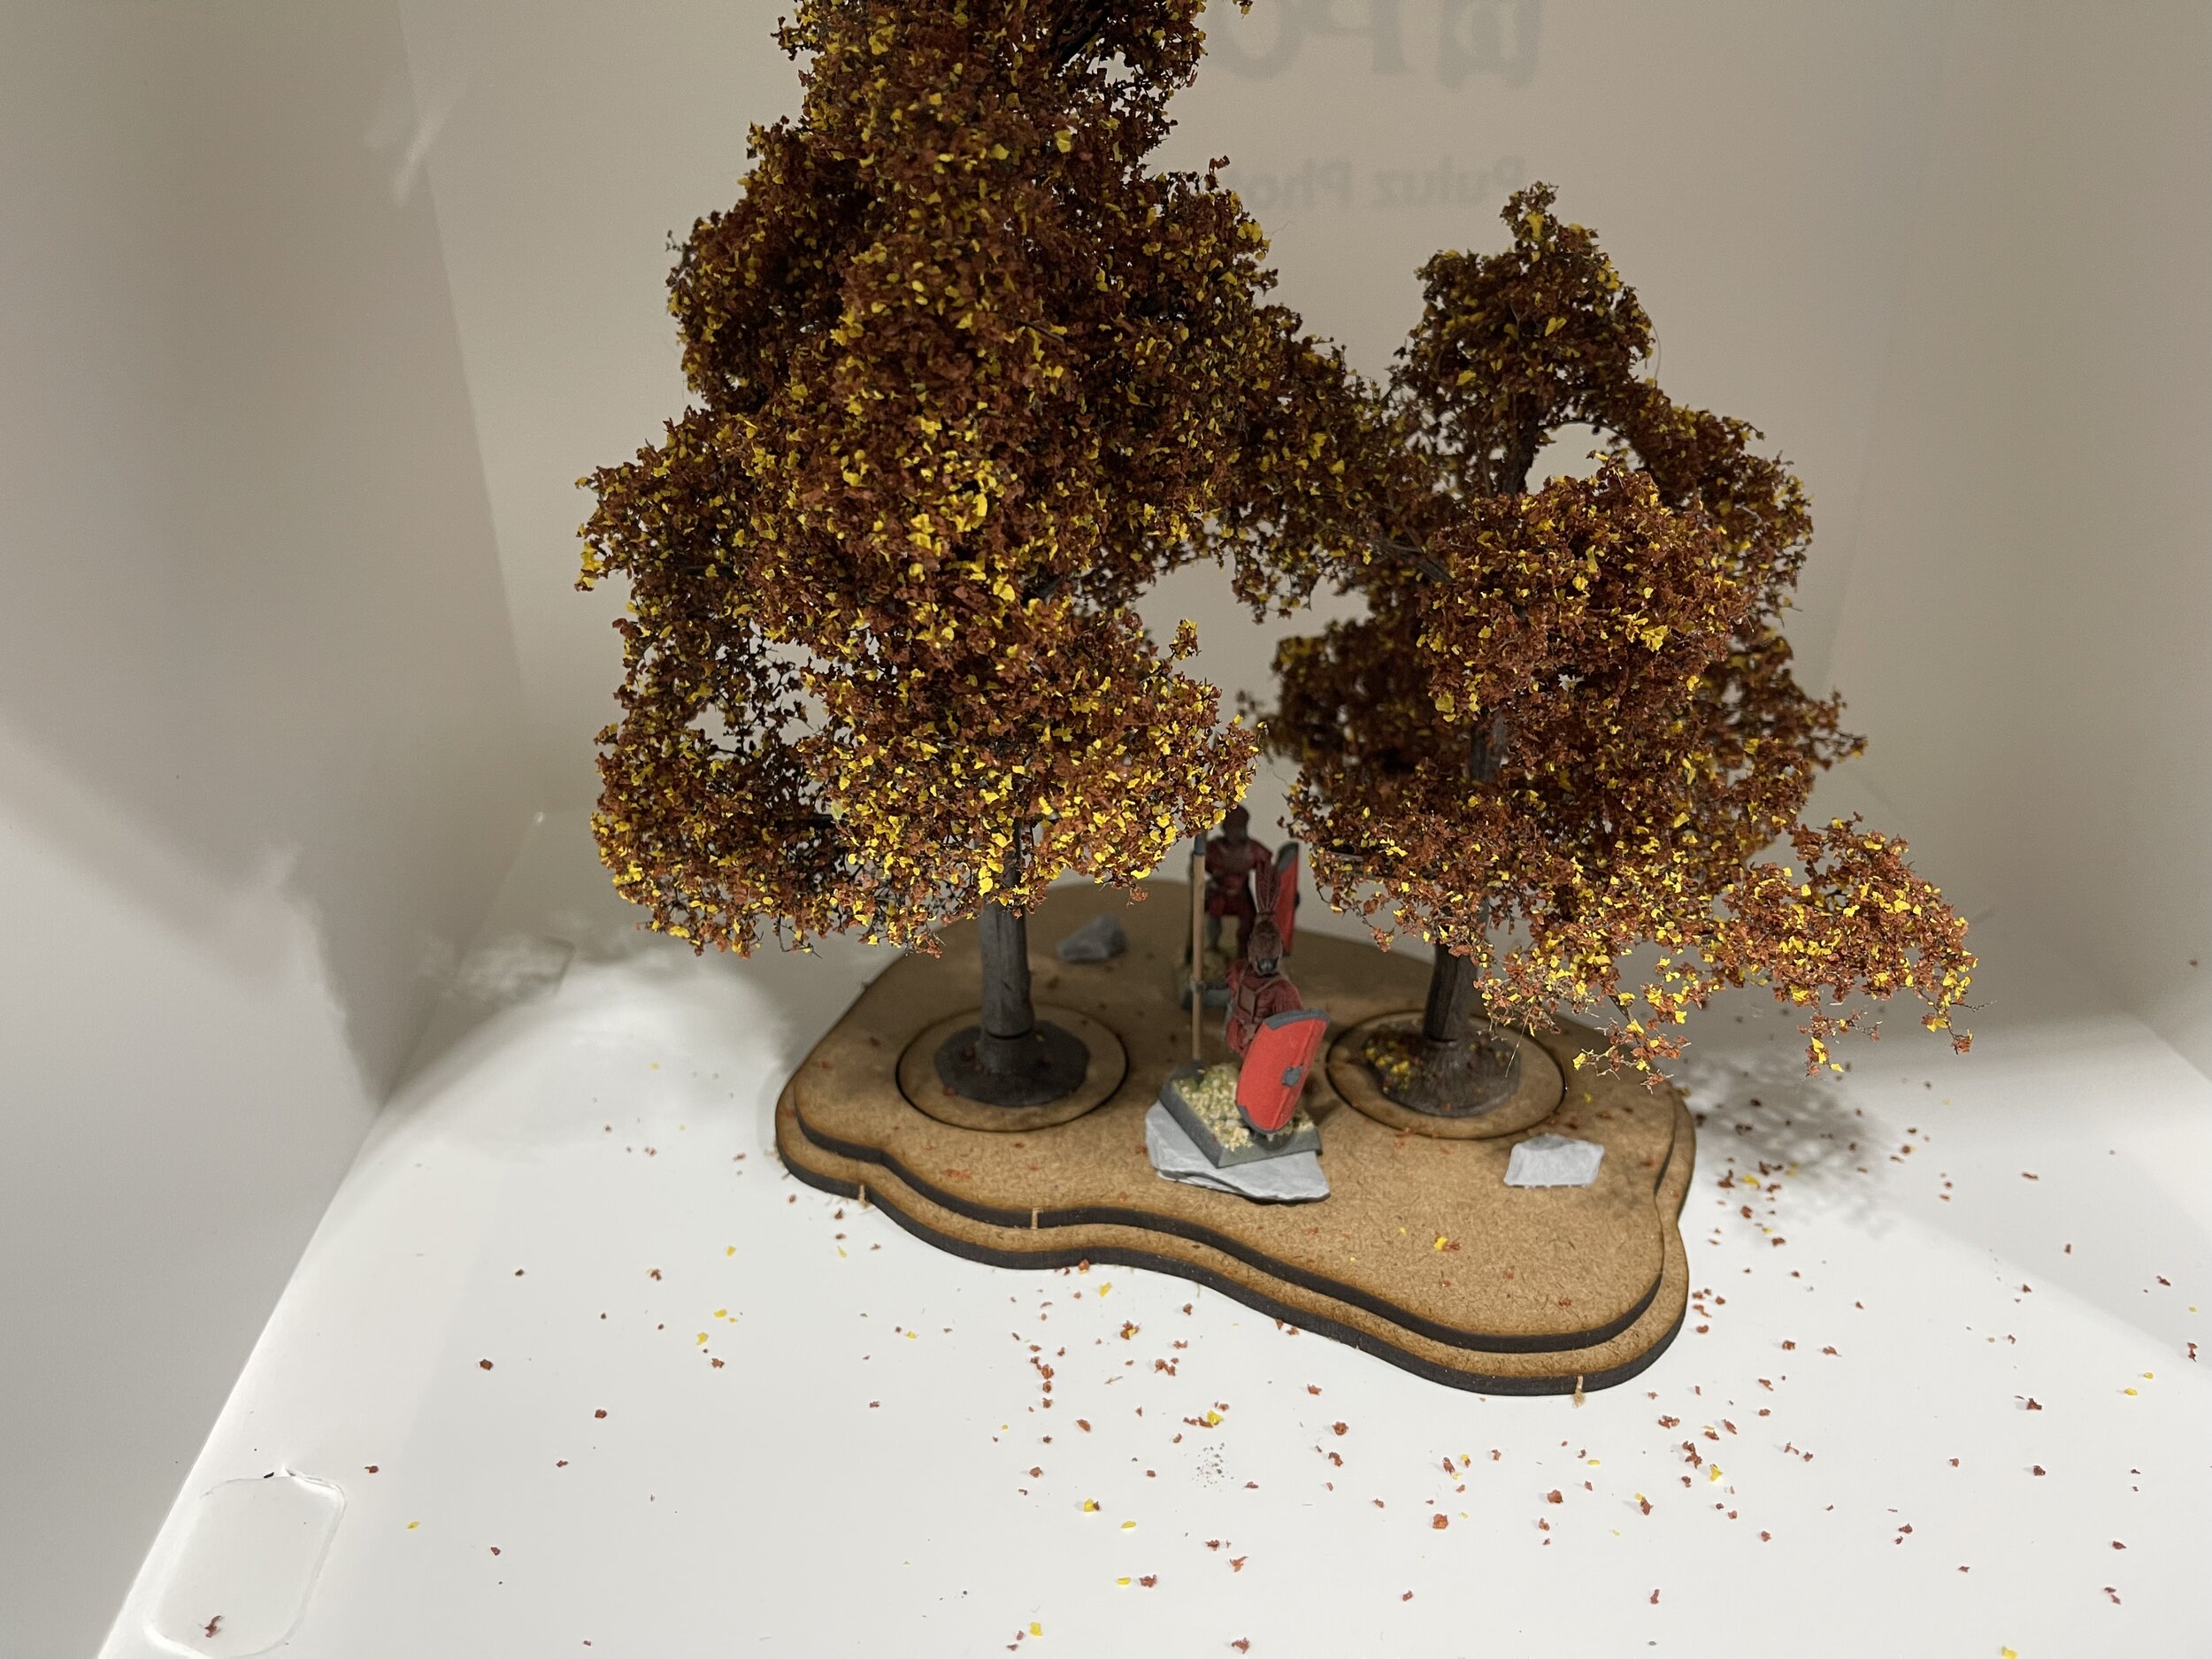
two fall trees on our medium forest template
Trees bring a gaming board to life. They are also useful for blocking line of site, hiding troops away from the enemy, and launching surprise attacks. There are a wide variety of trees available on the market with the most common being Woodland Scenics trees.
These trees are good, they don’t look bad, especially from a distance. That said there are ways to help bring trees to a bit more life. Why? Because I love how it looks. How it brings just that little extra life to the models and world around it.

An empty tree armature
Prep
We will start with an empty armature for the trees. You can get Woodland Scenics armatures. These can range in size from 2-3 inches to over 8 inches in height. Depending on the kind of board you want to create you can definitely get a variety of heights and styles. In this case we are using one of their medium deciduous trees.
We will also be using SuperTrees which you can get from ScenicExpress. This is like what is called Seafoam or Western Sagebrush. It has many little limbs on it and has been dried out for modeling use.
After that other things we will be using are SuperLeaf Aspen Yellow and Fall Leaf. I might later on add some Rusty Orange but I didn’t purchase that when I started on these trees.
We bend this into the shapes as they come in flat. You can bend the branches quite a bit and you can also twist the trunk to move how the different sections of the tree fit. You can see in the below image I have twisted the tree round so that it helps fill out gaps.

After we have bent our armature into a shape we are roughly happy with we need to then pluck our SuperTrees. We are trimming the small little branches from the stems. You can trim them big or small, they will all have a purpose on your game board eventually. You might encounter some leaves, just set these aside. You can grind them up later to add to your base templates for a bit of forest scatter.
Adding branches
After trimming up the SuperTrees you will start to add these to our armature. You will use either some super glue or another glue like Ailene’s Tacky Glue or Woodland Scenics Hob-e-Tac. I have experimented with both and they have their different advantages. In the case for today we will go ahead and use super glue.
In small sections apply some super glue to the armature branches and then set one of the twigs that we trimmed earlier to the tree. You can use some accelerator to help get the branches to stick faster. I might suggest using some hobby tweezers to apply the twigs to the branches. Otherwise you will be peeling glue, and potentially skin, off your fingers for a couple days.
Just keep adding to the branches. Go from the base of the branch all the way to the tips. Just to help fill out the tree. You can jam pack these trees and they should still be just fine.
Once you are pretty happy with everything you have added you can do a little pruning just to shape the tree up some. Overall though trees in nature aren’t any kind of perfect shape. So even big gaps are fine, it is something that might have happened as they were growing.
Painting
Painting the tree is going to tie both the twigs we added as well as the armature itself together. I use various paints from either Krylon or Rustoleum line. I normally get a darker brown and then a lighter brown.
With the dark brown apply it to the whole tree from all the angles you can. Go in even passes so it can quickly dry and also not over saturate the twigs. once you have a nice even coating on the tree give it some time to dry. Once dry from the top you will use the lighter brown to add some highlights to the branches. It doesn’t have to be much. It just helps a little with the looks of the tree when people can see through the foliage.
Flocking
Now depending on what you are trying to achieve you can mix your different colors of foliage together or add them in layers. I experiment back and forth with this but in the case of this fall foliage I mixed them together.
I put a heavier mix of the Fall Leaf with a light mix of the Aspen Yellow. I wanted more of the red than bright yellow on the trees. I mixed this all together in a container so I can use it again and again.
With our mix together you will setup two stations. The first station is where you are going to spray some adhesive onto the tree and the other is where you are going to then cover the trees with the flocking.
Use a spray adhesive like 3M General Purpose Spray Adhesive. On your glue station (I would suggest a box to catch the over spray) go ahead and spray lightly over the whole tree where you want leaves. Do it controlled, the tree will remain tacky… well basically forever. Once you have good coverage take the tree to your flocking station. You want this to not be your glue station otherwise your leaves will stick to the overspray and you will lose all that extra flock.
For the flocking station I normally setup another plastic tub, one of the rubbermaid large containers works great. I then start sprinkling the leaf mixture I have made up for the tree to it. Go slow and add leaves trying to keep them from sticking to the trunk but covering the branches. Once you have done this first pass over the trees you can shake them to dislodge the different leaves that haven’t actually stuck to the glue. You can then add some more of the leaf mixture to any kind of bare points. Don’t worry if you leaf mixture doesn’t stick. It could be that the glue didn’t reach those points.
If you think you have some bare spots that need leaves or even some weak spots that need additional leaves you can do some targeted adhesive application. Just a little bit here and there and then flock it again. You can do this on top of leaves that are already there. Repeat as much as you want.

Sealing
Once you are happy with how the tree appears you can then seal the tree. This will help to hold the leaves to the trees and it will also neutralize the spray adhesive that we used and any remaining tackiness. For this I use a matte spray varnish. Apply it evenly over the tree and leave it to dry. You can check once dry for any tacky spots and apply additional varnish if needed.
Basing
Now this article would totally be a waste if I didn’t plug some of my own stuff. So basing. Now there is any sort of mixtures you can use but first what to put it onto. I would suggest one of our Forest Templates. These template bases are great because the trees can stand on their own or they can stand on the template base. You can remove them when moving units through them and know they are still in a forest because you have the bases. When the trees are set in their bases they stand quite firm. The forest bases have 45mm bases for the trees to be mounted to which provides a nice stable platform for them.
Once on the forest base you can then add some further details like our Grabblecast Simple Stones, Mountain Stones, or even the Stumps with Mushrooms. These things add some additional life to the bases making it feel like a real forest. After that it is a matter of adding it to your gaming table and enjoying.